

Introduction
Throughout the day we perform various tasks using commands on our terminal, correct? Having a functional UI can make our routine a lot easier, especially when we want to share with other colleagues who are not familiar with the commands on the terminal.
After some research and a lot of testing, I found the powerful portainer.io, which provides a very good UI and, the coolest of all, with an open-source for everyone.
With portainer.io we can easily extract images, add containers, add networks, etc. This tool, in my humble opinion, is incredible and should be an option for all professionals who manage Docker systems.
So let's take a look at how it all works?
Prerequisites
- Centos 7.x, Centos 8.x, Ubuntu 18.04, Ubuntu 20.04
- Commands and instructions may vary slightly on other CentOS 7 releases and Linux distributions.
- 1024MB or above Ram.
- 20GB Disk Space.
- 1 vCPU or above CPU.
- Docker engine running on target host – Can be local or remote
- Linux, macOS or Windows docker host machine
- Internet connection to download Portainer docker image
What Portainer can do
- Manage Docker images – pull, delete, Build
- Quickly deploy applications from app templates
- Manage containers – start, stop, kill, restart, pause, resume, remove, create
- Manage networks – add, remove, edit
- Manage Volumes – add, remove, manage permissions
- Check docker engine events
- Add custom docker registry and add authentication for docker hub
- Create endpoints
- Add users to manage Docker
- Manage Docker swarm
- Create custom container templates
Step 1 - First step
Access the website portainer.io and then the installation option.
Let's go to the code!
Create a volume for Portainer with the following command:
docker volume create portainer_data
After the volume has been created, run the command below on your terminal:
# Usage: docker run [OPTIONS] IMAGE [COMMAND] [ARG...]
docker run -d -p 8000:8000 -p 9000:9000 --name=portainer --restart=always -v /var/run/docker.sock:/var/run/docker.sock -v portainer_data:/data portainer/portainer-ce
We will use the latest version of portainer.io which is 2.0, the above command is from Docker I am considering that you already have experience with the basic commands.
Commands Docker basics:
systemctl start/stop docker     #start/stop docker service
systemctl enable docker         #enable docker running when OS start
docker pull                     #pull Docker image
docker ps                       #list all running Containers
docker ps -a                   #list all Containers
docker start/stop CONTAINER ID #start/stop Container
docker rm CONTAINER ID         #delete Container by ID
docker kill CONTAINER ID       #shut down Container
docker images                   #list all images have been downloaded
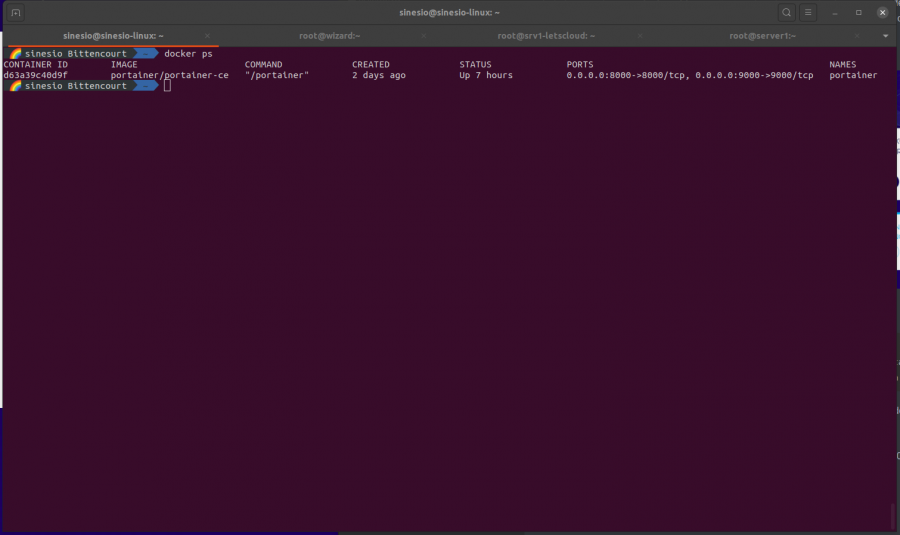
Step 2 - Check if portainer.io is running on Docker
Ready your portainer.io is already installed and running on its default port which is [SERVER_IP: 9000](http://server_ip: 9000/) as you can see in our image.
Portainer.io has several services that can help us in our daily lives, such as:
But we are not done here! I will show some functions inside the panel if your Docker is working correctly to access the UI by typing the following in your browser.
Note. SERVER_IP is the address of the Docker server
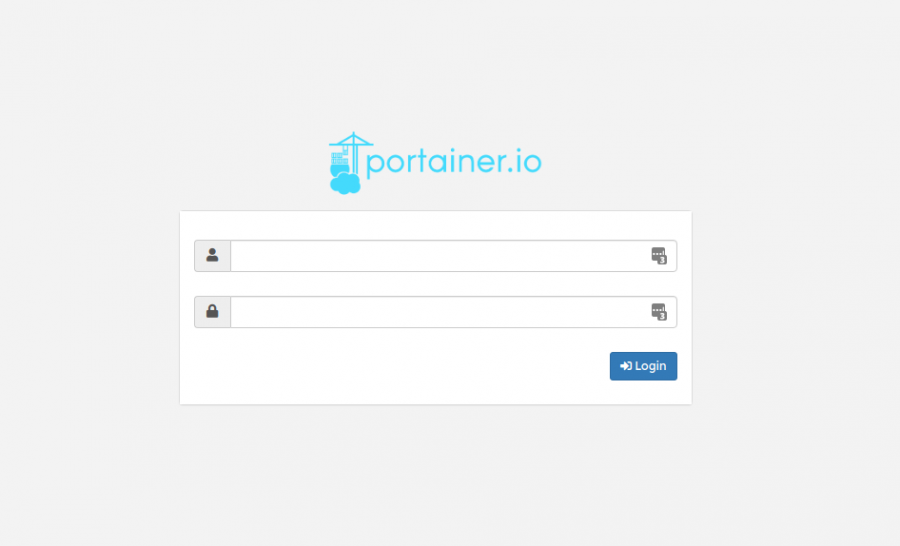
The first step will be like basic settings which, in general, is fast, you will have to define an administrator password and the environment you want to control, choose the local environment.
Step 3 - Accessing the panel
After making the initial settings, you will see the following image in your browser:
In the Portainer home screen, all Endpoints (environments) configured will appear. In my configuration, I will have two, one corresponding to the local environment and another environment that is connected to the LetsCloud.
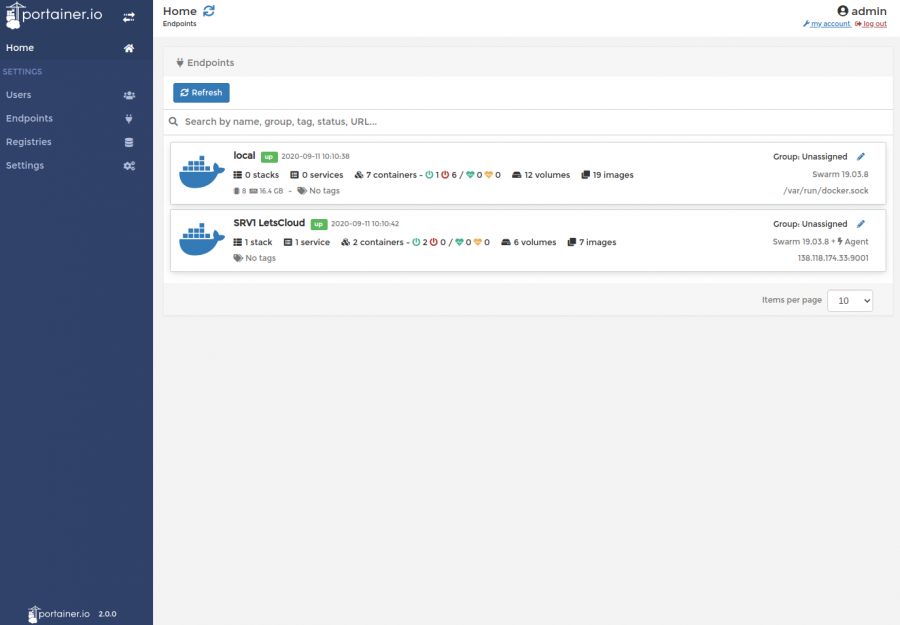
In your case, select the local Endpoint to view your portainer.io.
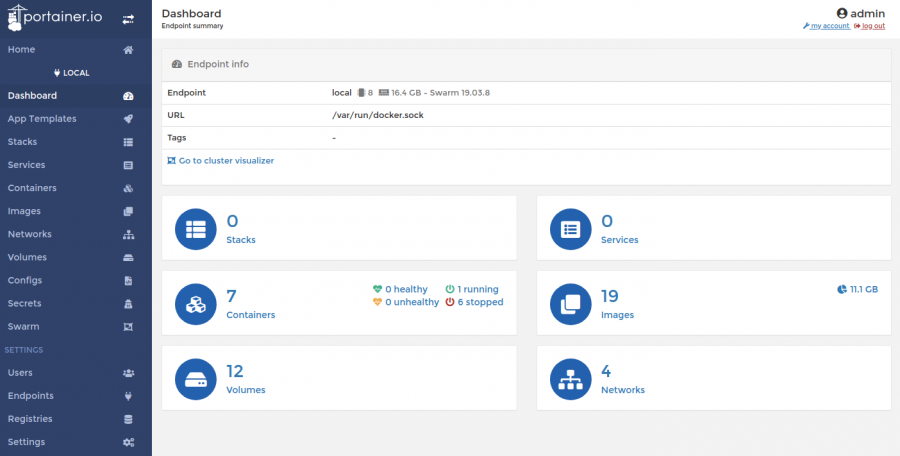
On my initial Dashboard, I can see my stacks, containers, volumes, services, images and networks. In this post, we will focus on containers and how to connect in a second environment (Endpoints).
Step 4 - Downloading and configuring Docker image on your Portainer
In our first example, we will use the ** WordPress ** installation, where we will do the initial setup on the dashboard our portainer.io.
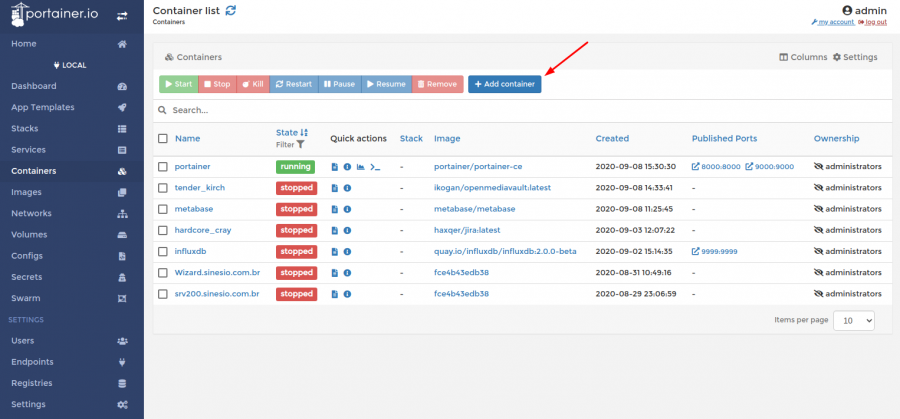
After selecting the option containers we will see the following screen:
Then portainer.io will present the following screen:
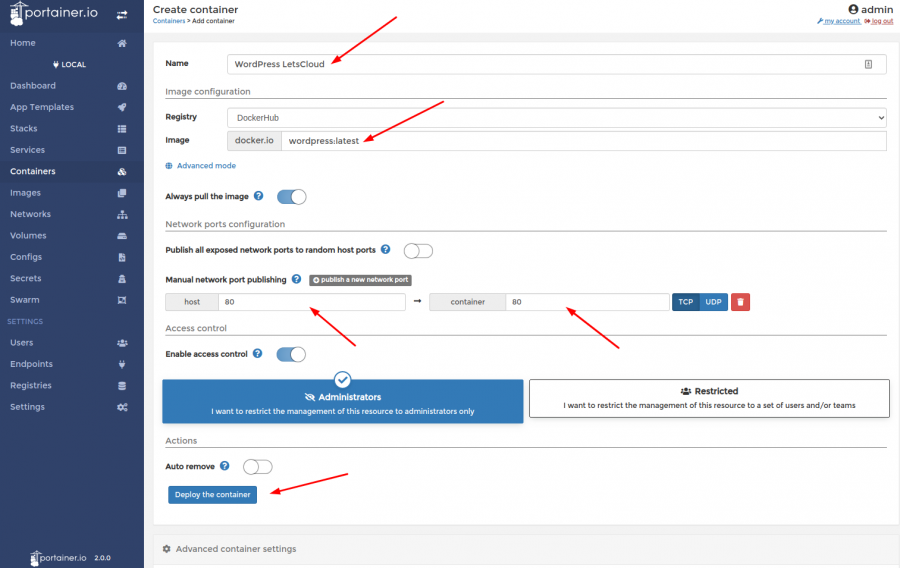
Name: define the name of your container Image: Name of the image in DockerHub Configuration of network ports: I suggest you enable the option to Publish all exposed network ports and then set port 80 manually, as shown in the image above.
Step 5 - Deploying
Click Deploy the container to start downloading the image and then start your container automatically.
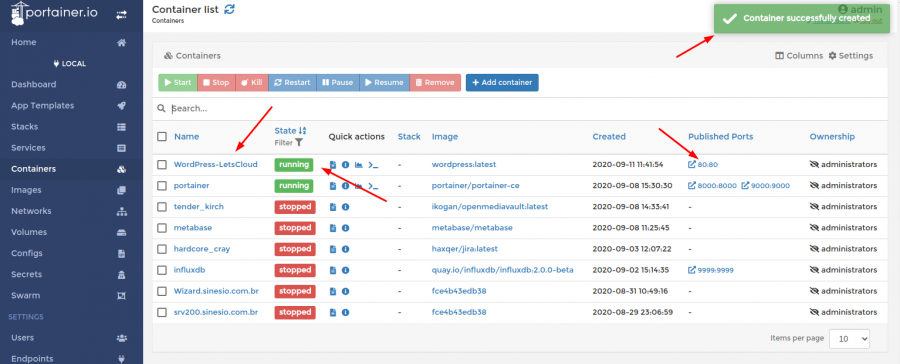
If everything works as expected, you will see WordPress container running on port 80. Use your browser to view the WordPress Welcome page.
Step 6 - Endpoints
We arrived at the second and last part of our post, but don't stop here portainer.io has many functions to be explored!
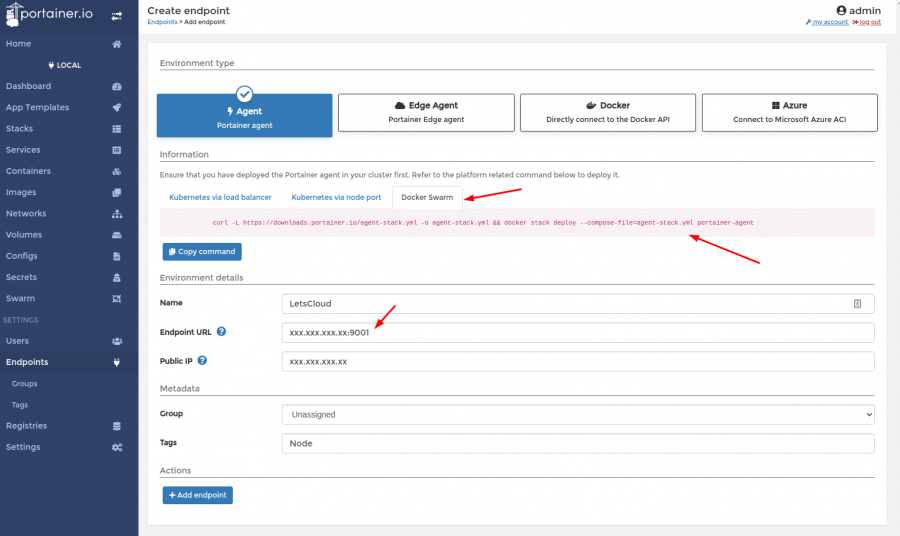
After you select the option endpoints we will have some options like:
Agent - Portainer agent Edge Agent - Portainer Edge agent Docker - Directly connect to the Docker API Azure - Connect to Microsoft Azure ACI
In our tutorial, we will only use Agent and for that, we need to run the agent on our second docker that is in our cloud on LetsCloud.
Step 7 - Installing the Agent
curl -L https://downloads.portainer.io/agent-stack.yml -o agent-stack.yml && docker stack deploy --compose-file=agent-stack.yml portainer-agent
Note. Just to remember, you must have Docker working at the destination!
Ready! If everything goes as expected, the agent will appear as running on your docker.
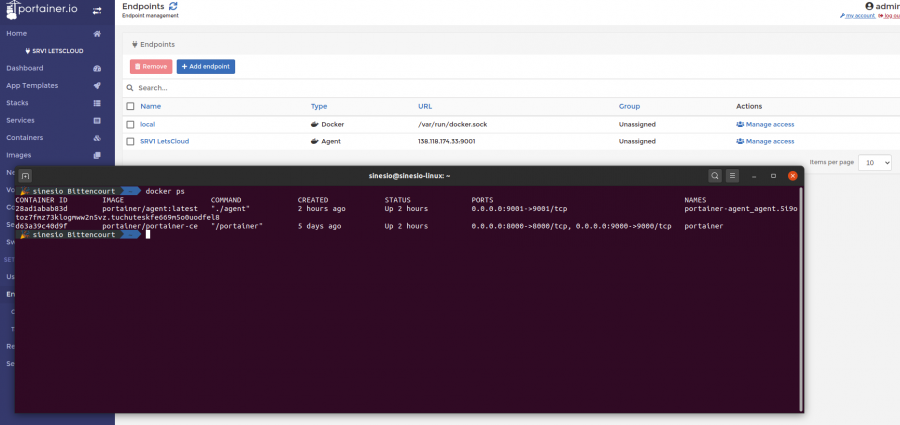
To test the functioning of your new machine, go to your portainer.io home screen.
Access the machine you just connected and repeat our installation of WordPress on the second machine.
So, did you like the content? You can't help but know how to update WordPress, as updates are an important part of system security, they improve performance and bring new features. Also, updating your site requires only a few clicks. It's simple, fast and essential!
Last tip: Before starting a project in production with portainer.io, research the limitations of your UI and if it will meet all your needs in the course of the project.
A very good place to search is the official forum, he also has Blog, channels on, Discord and a good documentation.
The hello-world container is only a simple container used to verify if the Docker engine is working correctly in the system and if the Portainer can start a container on the board. We will build more complex containers in the next sections.
Conclusion
Once you start using portainer.io in your daily life, you won't want to go back to the Docker command-line interface again. It is so easy that even the most experienced are using it daily in their projects.


 and Docker on Ubuntu 20.04")


0 COMMENTS