GitLab is a git-based and open-source software repository manager. It is an alternative to GitHub. GitLab comes in two editions: Community Edition and Enterprise Edition.
Let's install Community Edition in our walkthrough. The GitLab Community Edition was designed to be hosted on its infrastructure, in our case we will use VPS on LetsCloud.
GitLab provides teams with a single data store, a friendly user interface, allowing teams to collaborate, which significantly reduces time by focusing exclusively on building the software.
Resources
Its main advantages are flexibility in the implementation as an internal repository for a development team, a public form of interface with users or a means for contributors to host their projects.
Prerequisites
- Ubuntu 20.04 Server
- 3.75 GB or more of Ram - for better performance, use 6 GB
- 20 GB of disk space
- 1 CPU or higher
rootprivileges
So, let's start the installation
Step 1 - Log in to your server via SSH
Use the following command to log in to your server via SSH:
#ssh root@server_ip
Also, check if your system package database is up to date before continuing this tutorial.
Step 2 - Update Ubuntu
Log in to your server via SSH and before starting the installation of GitLab, it is always recommended updating the system packages.
So let's go to the command:
#sudo apt update
Then type:
#sudo apt upgrade
Install all dependencies by running the command:
#sudo apt install ca-certificates curl OpenSSH-server postfix
When prompted for the type, choose the e-mail server, select “Internet site”.
Step 3 - Installing GitLab
To install GitLab on the Community Edition version, you first need to enable the GitLab package repository, run the following command:
#wget https://packages.gitlab.com/install/repositories/gitlab/gitlab-ce/script.deb.sh
Run the script.deb.sh:
#sudo ./script.deb.sh
After the repository has already been downloaded, run the following command to install GitLab CE on your Ubuntu server:
#sudo EXTERNAL_URL="https://example.com"
Then the following command:
#apt install GitLab-CE
Make sure to change example.com for your domain.
The installation may take a few minutes to complete. The above command will automatically configure and install the Nginx web server and then run GitLab on the URL you created.
Once completed, you will see the following message on your screen:
         ####Running handlers:
Running handlers complete
Chef Client finished, 455/646 resources updated in 03 minutes 27 seconds
GitLab Reconfigured!
_______ __  __          __
/ () // /   ____ / /
/ / __/ / __/ /   / __ `/ __

/ // / / // // // / // /
_//_/___/_,/./
Thank you for installing GitLab!
GitLab should be available at http://your_gitlab_domain.com
For a comprehensive list of configuration options please see the Omnibus GitLab README
https://gitlab.com/gitlab-org/omnibus-gitlab/blob/master/README.md
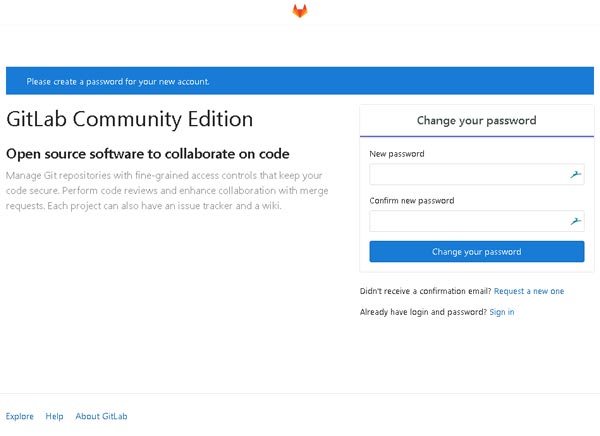
Open your browser and enter the server's IP address or the domain name you previously configured. Log in as root and then you will be asked to create a new password to access GitLab.

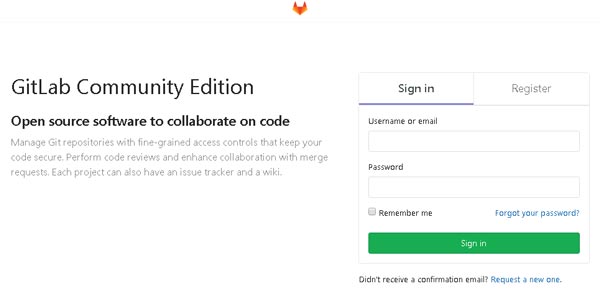
Now use the user root and the password you just created to log in to GitLab.

You can change the user name root by going to settings and then pressing account.
From that point on, your GitLab was successfully installed and run on your Ubuntu server.
Step 4 - Security, encrypting the configuration
Let's Encrypt comes enabled by default in GitLab if the external url is configured with https. If you used http, you can activate Let's Encrypt by editing the file via terminal at /etc/gitlab/gitlab.rb.
#vim /etc/gitlab/gitlab.rb
/etc/gitlab/gitlab.rb
##! For more details on configuring external url see: ##! https://docs.gitlab.com/omnibus/settings/configuration.html#configuri... external_url='https://example.com'' letsencrypt['enable']=true
Save and close the file. Run the following command to reconfigure GitLab:
#gitlab-ctl reconfigure
Make sure to run sudo gitlab-ctl reconfigure after enabling Let's Encrypt.
Step 5 - GitLab Backup
To create a backup of your GitLab instance, you only need one command. It is always recommended to have at least one backup per month.
#sudo gitlab-rake gitlab:backup:create
By default, the backup is stored at /var/opt/gitlab/backups. You can change the backup path by editing the settings in the GitLab configuration file at /etc/gitlab/gitlab.rb.
For example, if you want to store your GitLab backups at /mnt/backups, make the following changes to the file /etc/gitlab/gitlab.rb.
#gitlab_rails['backup_path'] = '/mnt/backups'
Once this is done, run the reconfigure command again:
#gitlab-ctl reconfigure
Creating a cron job is a great idea to make your backups automatic, so you don't have to worry about creating them manually.
Here is an example of how to create an automatic backup:
#0 3 * * 2-6 sudo gitlab-rake gitlab:backup:create
Examples of how to use the cron scheduling component.
* * * * *- Run the command every minute.12 * * * *- Execute the command 12 minutes after each hour.0,15,30,45 * * * *- Execute the command every 15 minutes.* / 15 * * * *- Run the command every 15 minutes.0 4 * * *- Run the command every day at 4:00 AM.0 4 * * 2-4- Run the command every Tuesday to Wednesday to Thursday at 4:00 AM.20.40 * / 8 * 7-12 *- Execute the command in the twentieth and fortieth minute of each eighth hour, every day of the last 6 months of the year.
Step 6 - Email setup
By default, GitLab will use Sendmail to send emails from the application. If you want to use Google's SMTP server instead of the default Sendmail, open the configuration file GitLab /etc/gitlab/gitlab.rb and make the following changes.
/etc/gitlab/gitlab.rb
gitlab_rails['smtp_enable'] = true gitlab_rails['smtp_address'] = "smtp.gmail.com" gitlab_rails['smtp_port'] = 587 gitlab_rails['smtp_user_name'] = "[email protected]" gitlab_rails['smtp_password'] = "my-gmail-password" gitlab_rails['smtp_domain'] = "smtp.gmail.com" gitlab_rails['smtp_authentication'] = "login" gitlab_rails['smtp_enable_starttls_auto'] = true gitlab_rails['smtp_tls'] = false gitlab_rails['smtp_openssl_verify_mode'] = 'peer' # Can be: 'none', 'peer', 'client_once', 'fail_if_no_peer_cert', see http://api.rubyonrails.org/classes/ActionMailer/Base.html
When you're done, save the file. You can then run the following command for the changes to take effect:
#sudo gitlab-ctl reconfigure
Congratulations! You installed and configured GitLab on your Ubuntu. Good job!
Conclusion
In this tutorial, you saw how to install GitLab completely, was it difficult? Now comes the fun part: exploring all the options that GitLab offers!
If you have any questions about installing and configuring GitLab on Ubuntu, please contact us in the comments.


0 COMMENTS