
Jenkins is an opensource automation server. It is used by developers in automating tasks in the software development cycle. It ships with numerous and handy plugins which help in continuous integration by enabling developers to make the necessary changes to applications before going into production. In this topic, we will install Jenkins on Ubuntu 20.04 LTS, which is the latest Ubuntu version.
Automation of tasks can be quite tricky especially where multiple developers are submitting code to a shared repository. Poorly executed automation processes can often lead to inconsistencies and delays. And this is where Jenkins comes in. Jenkins is a free and opensource continuous integration tool that’s predominantly used in the automation of tasks. It helps to streamline the continuous development, testing and deployment of newly submitted code.
Prerequisites
- 2 or more Linux servers running Ubuntu 20.04
- root privileges
- 3.75 GB or more of Ram - for better performance, use 6 GB
- 2 CPUs or more
- Full network connectivity between all machines in the cluster (public or private network is fine)
- Unique hostname, MAC address, and product_uuid for every node.
- Certain ports are open on your machines.
- Swap disabled. You MUST disable swap for the kubelet to work properly.
Goals
Installing Jenkins Check and Installing OpenJDK Starting Jenkins Configuring the firewall Setting up Jenkins
So, let's start the installation
Step 1 - To check if Java is installed on your system
Run the command:
#java --version
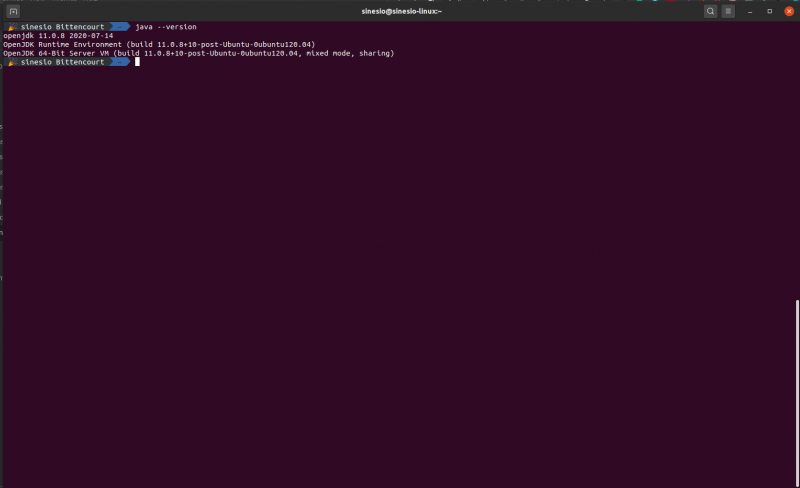
Since Jenkins is Java-based, you need to install OpenJDK. We are going to install OpenJDK, execute the command:
#sudo apt install openjdk-11-jdk-headless
Step 2 - Update Ubuntu
Always recommended updating the system packages.
So let's go to the command:
#sudo apt update
Then type:
#sudo apt upgrade
Step 1 - Install Jenkins
Jenkins is available from Ubuntu repositories and can be installed directly using the APT package manager. However, the version installed will not be the latest. To install the latest version on your system, and enjoy the latest features and bug fixes, we will take advantage of the project-maintained packages.
First, add Jenkins repository key to your system as shown:
#wget -q -O - https://pkg.jenkins.io/debian/jenkins.io.key | sudo apt-key add -
The command should return an ‘OK‘ response as shown.
With the repository key in place, add the Debian’s package repository to the sources.list file as shown
STABLE JENKINS VERSION
#sudo sh -c 'echo deb http://pkg.jenkins.io/debian-stable binary/ > /etc/apt/sources.list.d/jenkins.list'
LATEST JENKINS VERSION
#sudo sh -c 'echo deb http://pkg.jenkins.io/debian binary/ > /etc/apt/sources.list.d/jenkins.list'
Now update the system so that the APT package manage can begin using the newly added repository.
Simply run the command below
#sudo apt install jenkins
Step 2: Start Jenkins
Jenkins is started upon installation on Ubuntu 20.04. You can confirm it’s running status by executing the command:
#sudo systemctl status jenkins
From the output, we can clearly see that Jenkins is up and running.
If by any chance Jenkins is not started, execute the command below to have it up and running:
#sudo systemctl start jenkins
To enable Jenkins upon booting, run the command:
#sudo systemctl enable --now jenkins
Jenkins will now start every time you restart or power on your system. That’s great!
Step 3: Configuring the firewall
At this point, we can only access Jenkins from the local server. We need to make a few adjustments to the firewall so that external users can access our server.
#sudo ufw allow 8080/tcp
#sudo ufw reload
To confirm that we have opened port 8080 on which Jenkins will be listening to, run the command:
#sudo ufw status
The output confirms that the port is open on the firewall. Now, let’s proceed and set up Jenkins on the browser,
Step 4 - Setting up Jenkins and config
Connect to the Jenkins server using your browser either from the local server https://LOCALHOST:8080 or remote machine https://HOSTNAME:8080/.
When connecting remotely to a firewall enabled Jenkins server allow the 8080 port for incoming traffic:
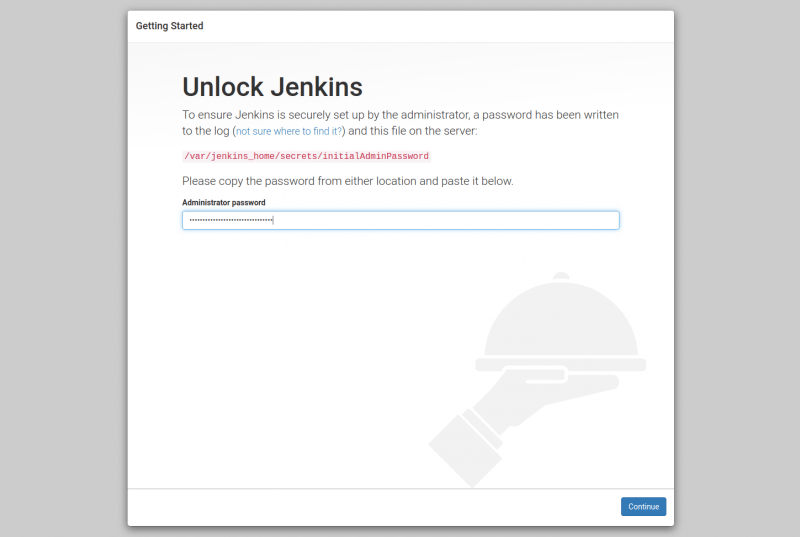
You will get the first page which is the ‘Unlock Jenkins‘ screen as shown. In order to securely set up Jenkins, you will be required to paste the Administrator’s password which is located on the path indicated below.
So head out to your terminal and use the cat command to reveal the password.
$ sudo cat /var/lib/jenkins/secrets/initialAdminPassword
8b5e143dfb5e143ea586b5e143ca53afe746a1e
Copy and paste the password back to the ‘Administrator’s password‘ text field as shown. Once pasted, click on the ‘Continue‘
On the next page, select “Install custom packages“
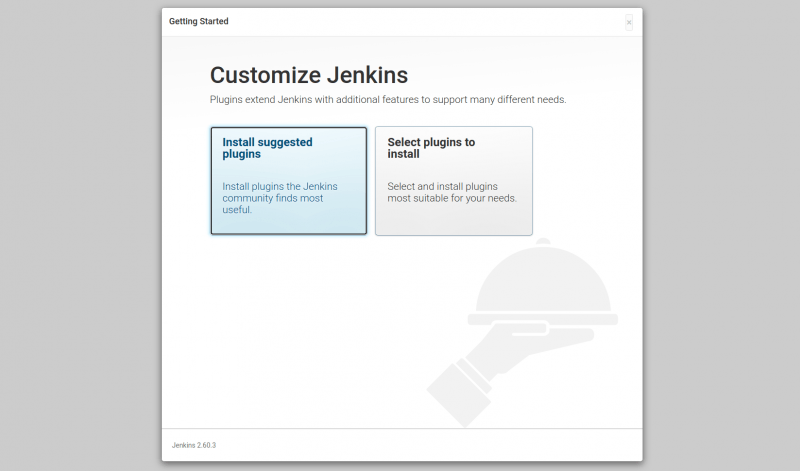
Thereafter, the installation of the plugin will commence as shown. This will take between 5- 10 minutes and you can grab some tea or coffee as Jenkins installs all the requisite plugins.
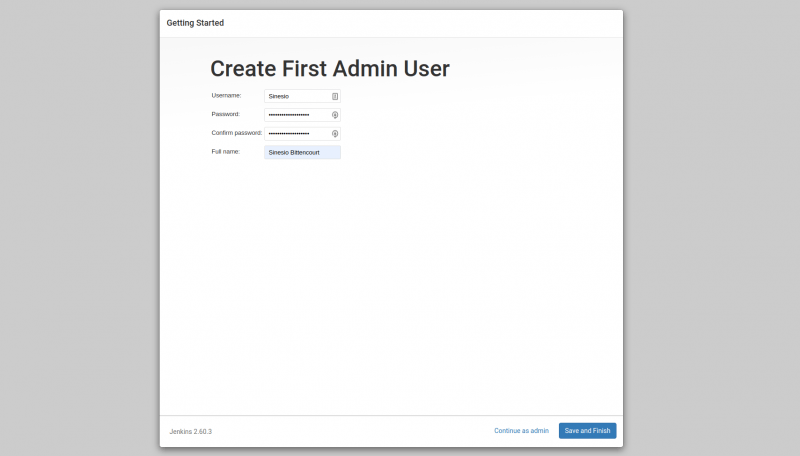
Next, you will be required to create an admin user. So fill up all the details as shown and click ‘Save and Continue‘.
In the next step, Jenkins will display the URL that you will use to log in and access its interface. Click ‘Save and finish‘ to end the installation process.
Finally, you will get the go-ahead notification to start using Jenkins!
Click on the ‘Start using Jenkins‘ button to access the Jenkins dashboard.
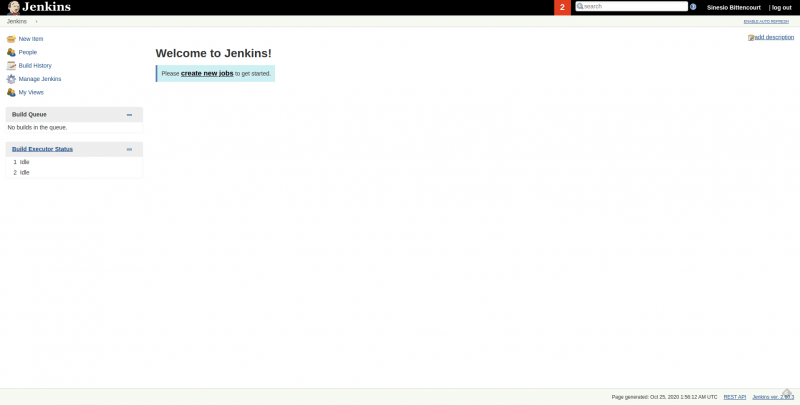
And there you have it. We have successfully managed to install Jenkins on Ubuntu 20.04 LTS.
Conclusion
You can now proceed and create new jobs and automate your process. In this post, you learned how to install Jenkins on Ubuntu 20.04. At this point, you can start exploring Jenkins and all its functions.


 and Docker on Ubuntu 20.04")


0 COMMENTS