

CyberPanel is a cutting-edge hosting control panel, developed by OpenLiteSpeed. Built with a focus on speed, security and reliability, it automatically installs the main services such as DNS, FTP, database, e-mail, file manager, automatic SSL and many other resources, all of which are available free of charge to the community.
You are in control of your total hosting environment. It allows you to host your websites in an easier and faster way, but CyberPanel also presents a high performance with an event-oriented architecture that is super light and that uses the minimum of CPU and memory space.
In this tutorial, you will learn How To Install the Control Panel CyberPanel on your server at LetsCloud.
Prerequisites
- Commands and instructions may vary slightly in other versions of (CentOS) 7 and Linux distributions.
- 2048 MB or more of Ram.
- 10 GB of disk space.
- 2 vCPU or higher CPU.
- Root access
CyberPanel features
- Different levels of users.
- Automatic SSL.
- FTP server.
- DNS server.
- PHPMyAdmin.
- File manager.
- PHP Management.
- Firewall.
- Automatic backup and restore.
- Email limits.
- SpamAssassin and more.
Let's start the test!
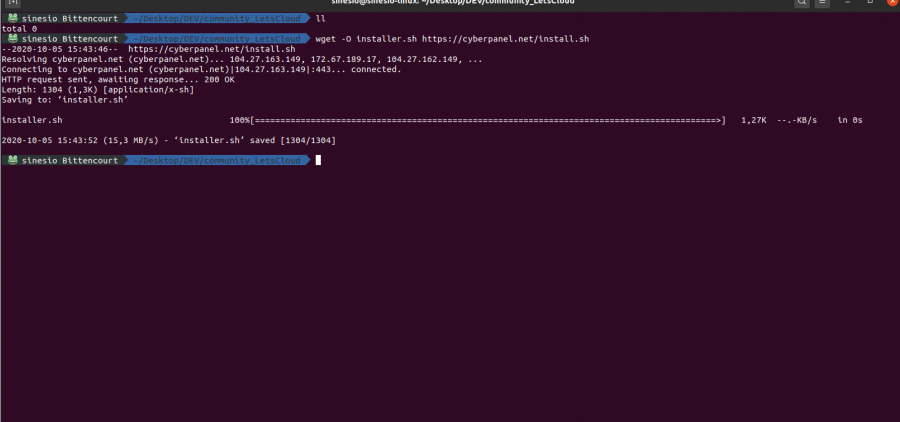
Step 1 - Downloading the CyberPanel installation script
Open your terminal and type:
#wget -O installer.sh https://cyberpanel.net/install.sh
or
#sh <(curl https://cyberpanel.net/install.sh || wget -O - https://cyberpanel.net/install.sh)
Note. Always update the packages installed on your system before any installation.
#yum update -y
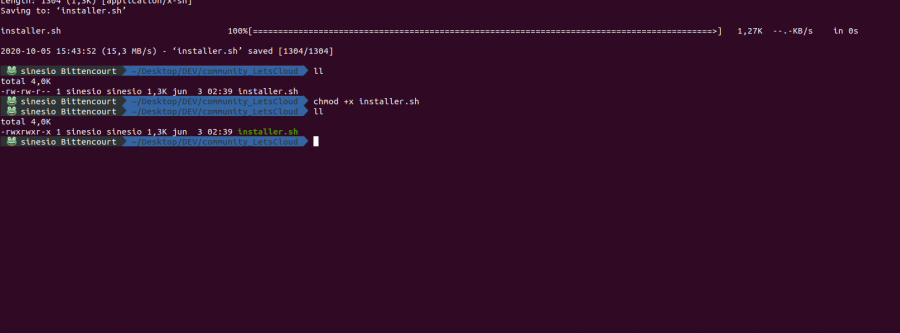
Now let's make the cyberpanel script an executable, type the following in your terminal:
#chmod +x installer.sh
See how the file will look in our print:
Next, we will run the installer.sh with the following command:
#sh installer.sh
Step 2 - Configuring
After running the installer.sh file, we will have the following screen:
Initializing...
Valid IP detected...
Checking server...
Checking OS...
Detecting CentOS 7 ...
Checking virtualization type...
Checking root privileges...
CyberPanel Installer v2.0

    1 Install CyberPanel.
    2 Install Addons.
    3 Exit.

Please enter the number[1-3]: 1
Select the option 1, it will perform the complete installation of CyberPanel.
Step 3 - CyberPanel with OpenLiteSpeed
Next is the installation step of OpenLiteSpeed or LiteSpeed Enterprise.
CyberPanel Installer v2.0
RAM check : 2048MB
Disk check : 20GB (Minimal 10GB free space)

1. Install CyberPanel with OpenLiteSpeed.
2. Install Cyberpanel with LiteSpeed Enterprise.
3. Exit.

Please enter the number[1-3]: 1
Select option 1 again to install CyberPanel with OpenLiteSpeed.
You should see the following output:
   Please choose to use the default admin password letscloud, randomly generate one (recommended) or specify the admin password?
Choose [d]fault, [r]andom or [s]et password: [d/r/s] d
The admin password will be set as letscloud
Type d and press ENTER to use the default administrator password. You should see the following output:
          This may improve panel loading speed in the Asia Pacific region...
Please select [y/N]: y
Install the Memcached extension for PHP?
Please select [y/N]: y
Install LiteSpeed Memcached?
Please select [y/N]: y
Install Redis extension for PHP?
Please select [y/N]: y
Install Redis?
Please select [y/N]: y
Step 4 - Memcached, LiteSpeed and Redis
Type Y to start Memcached, LiteSpeed and Redis installation. Once the installation is completed successfully, you will see the following output on your terminal:
  ###################################################################################
CyberPanel Successfully Installed

Current Disk usage : 20GB
Current RAM  usage : 2048MB
Installation time  : 0 hrs 5 min

Visit: https://127.0.0.1:8090
Panel username: admin
Panel password: letscloud

Please change your default admin password
If you need to reset your panel password, please run:
adminPass YOUR_NEW_PASSWORD

If you change the MySQL password, please  modify the file in
/etc/cyberpanel/mysqlPassword with the new password as well

Website : https://www.cyberpanel.net
Forums  : https://forums.cyberpanel.net
Wikipage: https://docs.cyberpanel.net

Enjoy your accelerated Internet by
CyberPanel & OpenLiteSpeed

###################################################

If your provider has a network-level firewall
Make sure you have opened the following entry/exit door:
TCP: 8090 for CyberPanel
TCP: 80, TCP: 443 and UDP: 443 for a webserver
TCP: 21 and TCP: 40110-40210 for FTP
TCP: 25, TCP: 587, TCP: 465, TCP: 110, TCP: 143 and TCP: 993 for mail service
TCP: 53 and UDP: 53 for DNS service
Step 5 - Accessing the CyberPanel
- Access your server's IP address, remember to use port 8090.
- Here is an example: https://your_server_ip:8090.
- You will see a screen to log into your newly installed system.
- Enter admin for the username and letscloud for the password.
- Click on the user menu arrow next to the name "Cyber Pan".
- Choose Edit Profile.
- Select the option admin from the drop-down menu on the page Modify user.
- Now you can change the name, surname, email address and password as you prefer.
- Use a strong password!
- https://www.lastpass.com/pt/password-generator
Congratulations, you have successfully installed CyberPanel! \o/
Now you can host an unlimited number of sites using CyberPanel and have your hosting reseller.
Quick Tip
Configure firewall rules in Letscloud
Firewall rules define what type of Internet traffic is allowed or blocked. For customers LetsCloud, you can do this right on our dashboard!
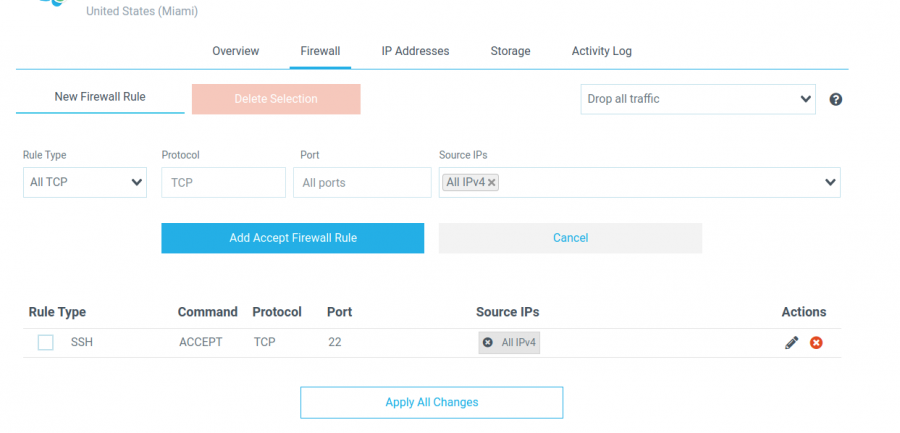
You must configure the firewall rules to allow traffic over the internet to the following ports:
                  20 – FTP
21 – FTP
22 – SSH
25 – SMTP/EMAIL
43 – WHOIS
53 – BIND/DNS
80 – HTTP / Apache Web server
110 – POP3/EMAIL
143 – IMAP
443 – HTTPS / Apache Web server SSL
465 – SMTP/EMAIL SSL/TLS
587 - SMTPS
873 – RSYNC
993 – IMAP/EMAIL SSL
995 – POP3/EMAIL SSL
8090 – CyberPanel Panel
7080 - WebAdmin
3306 – MYSQL
Conclusion
In this tutorial, you saw how to install CyberPanel completely, was it difficult? Now comes the fun part: exploring all the options that CyberPanel offers! Count on our technical team in this process if you need any guidance or help for your project, just use the comments!


 and Docker on Ubuntu 20.04")


0 COMMENTS