MkDocs is a fast, simple and downright gorgeous static site generator that’s geared towards building project documentation. The source documentation files are written in Markdown and set up with a single YAML configuration file.
Prerequisites
- Ubuntu 20.04 or Ubuntu 20.10
- 1024MB or above Ram.
- 10GB Disk Space.
- 1 vCPU or above CPU.
- root privileges
Step 1 - Log in to your server on SSH
Use the following command to log in to your server on SSH:
##╭─[email protected]
╰─➤ ssh root@server_ip
Also, check if your system package database is up to date before continuing this tutorial.
Step 2 - Update Ubuntu
Log in to your server via SSH and before starting the installation of MkDocs, it is always recommended updating the system packages.
So let's go to the command:
##╭─[email protected]
╰─➤ sudo apt update
Then type:
##╭─[email protected]
╰─➤ sudo apt upgrade
Step 3 - Install Python 3 or plus
Verify Python 3 is installed
╭─[email protected]
╰─➤ python3 --version
Python 3.7.3
You need Python 3 or more for this installation!
Step 4 - Install MkDocs
╭─[email protected]
╰─➤ sudo apt install mkdocs
mkdocs --version
mkdocs, version 1.0.4 from /usr/lib/python3/dist-packages/mkdocs (Python 3.7)
Step 5 - Create a new project called mkdocs and build a new site
╭─[email protected]
╰─➤ sudo mkdocs new mkdocs
╭─[email protected]
╰─➤ cd mkdocs
╭─[email protected]
╰─➤ sudo mkdocs build
Step 6 - Verify the following files are created successfully
╭─[email protected]
╰─➤ ls -la /mkdocs

docs  mkdocs.yml  site  ssl

╭─[email protected]
╰─➤ ls -la /mkdocs/site

404.html  css  fonts  img  index.html  js  search  sitemap.xml  sitemap.xml.gz
Step 7 - Install Python PIP and mkdocs-meterial theme
╭─[email protected]
╰─➤ sudo apt install python3-pip
╭─[email protected]
╰─➤ pip3 install mkdocs-material
Step 8 - Modify /mkdocs/mkdocs.yml to use mkdocs-meterial theme
╭─[email protected]
╰─➤ sudo vim /mkdocs/mkdocs.yml
site_name: My Docs
theme:
  name: material
Step 9 - Start mkdocs
IP Address = 0.0.0.0 and listening on Port 8000
╭─[email protected]
╰─➤ mkdocs serve -a 0.0.0.0:8000
INFO    -  Building documentation...
INFO    -  Cleaning site directory
[I 210201 01:03:15 server:298] Serving on http://0.0.0.0:8000
[I 210201 01:03:15 handlers:59] Start watching changes
[I 210201 01:03:19 handlers:132] Browser Connected: http://0.0.0.0:8000
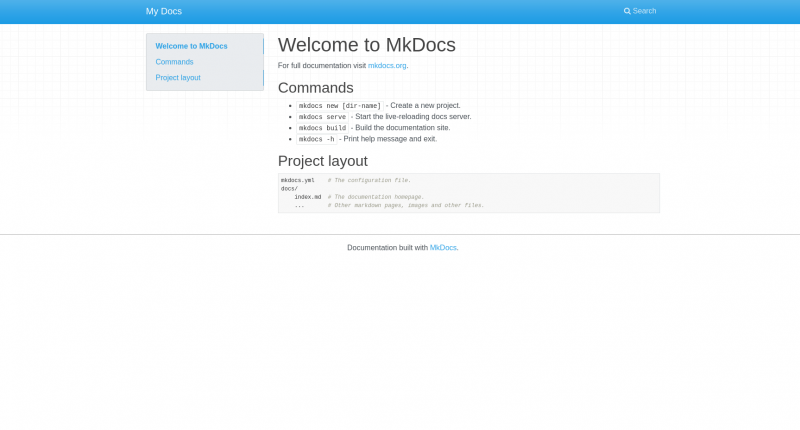
Verify MkDocs is accessible on 0.0.0.0:8000
That’s all, I hope that this tutorial is useful for you, if so, clap your hands! (:
BONUS!
Image With a Dockerfile
The above approach is hands-on. If you must do it over and over, then create a Dockerfile to take a picture of it. It will be more productive.
To follow all the same steps as you did earlier but in a Dockerfile, just write this:
FROM python:3

RUN pip install mkdocs
RUN mkdocs new letscloud

EXPOSE 8000

WORKDIR /letscloud

ENTRYPOINT ["mkdocs"]

CMD ["serve", "--dev-addr=0.0.0.0:8000"]
In the folder where the Dockerfile resides, run the command below to build the image:
You can replace *letscloud* with your own preferred image name.
╭─[email protected]
╰─➤ docker build -t letscloud .
After you have the image, you can just run it:
╭─[email protected]
╰─➤ docker run -itd -p 8089:8000 --rm letscloud
You’re all done. You can browse it in localhost:8089, and it will be the same as what you did interactively just now!
Conclusion
In this tutorial, you installed and managed the mkdocs. Now that you have your mkdocs installed. It is so easy that even the most experienced are using it daily in their projects.
If you have any suggestions feel free to contact me or just leave a comment below.








0 COMMENTS