

Introduction
CentOS Web Panel, or CWP, is a powerful, free web hosting control panel that provides an easy to use and manage server interface with many management tasks. It is designed for use with CentOS, RHEL and CloudLinux. This article will walk you through installing and configuring CWP on CentOS 7.
Prerequisites
To follow this guide, you'll need a fresh/minimal CentOS 7 x64 with at least 2GB of RAM and a valid DNS name pointing its A record to your server IP address.
Create and configure a new Instance.
Once you have your instance up and runing, login via ssh to begin.
Step 1 - Download and Install CWP
On a freshly installed CentOS 7, wget is not available. Install it by issuing following command:
$yum -y install wget
Next, make sure all the packages in the system are up-to-date by using yum command:
$yum -y update
Now, download the installation script and make the script executable before running it.
$$$wget http://centos-webpanel.com/cwp-el7-latest
chmod u+x cwp-el7-latest
./cwp-el7-latest
The above installation process should take some time to complete. Upon completion, CWP will provide a link, username and password to log in to the control panel.
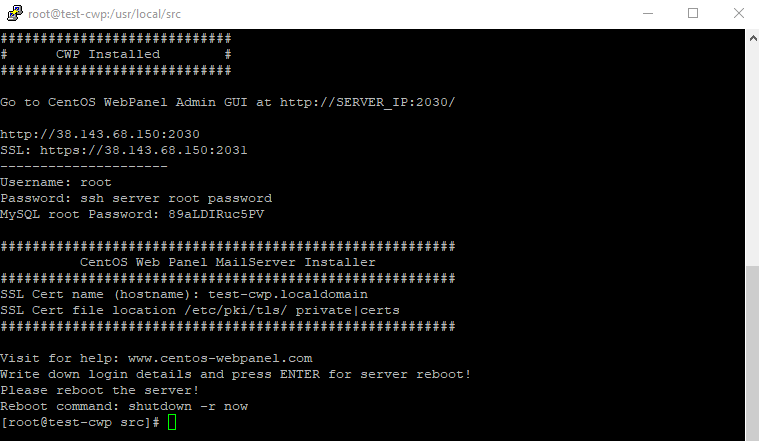
To complete the installation you must restart the server.
$shutdown -r now
Step 2 - Configuring CWP
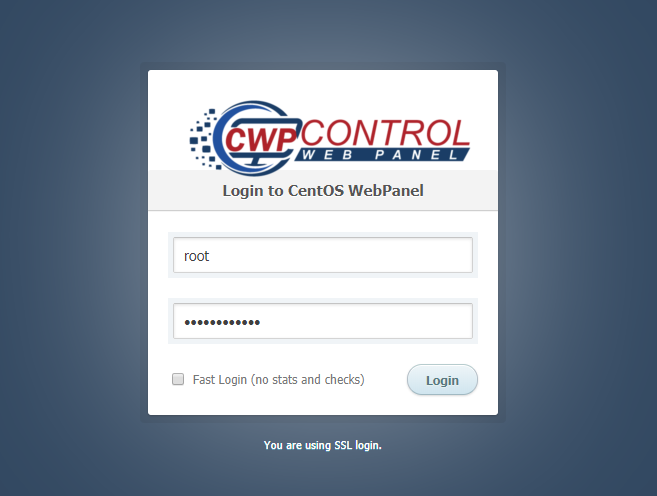
After that the installation of CWP on CentOS 7 has finished, let's go to the URL https://your_server_ip:2031 and provide the credentials that were made available at the end of the installation.
Note that the URL begins with https:// and not http://. It means that we are accessing CWP over a secure connection. Since we have not yet set up any certificates, a certificate generated by default by the unsigned server is used, which is why you will receive a warning message from your browser and you can safely add it to your exceptions list and proceed with logging CWP.
Enabling Firewall
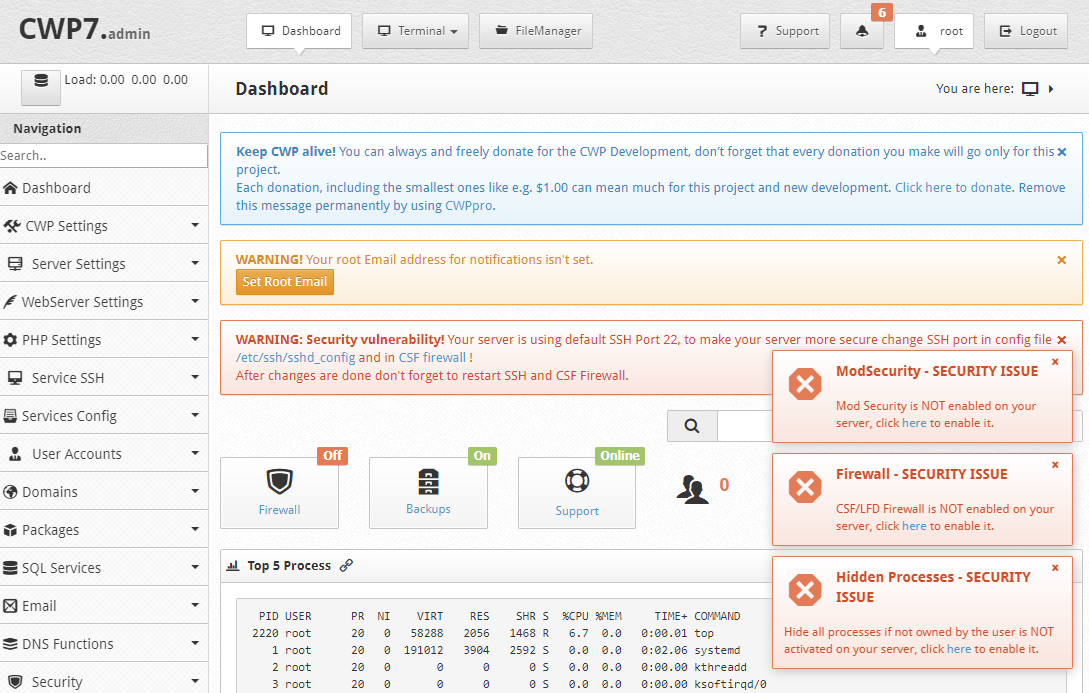
Once logged in successfully, the first thing you want to do is enable firewall.
There will be some warnings as well in orange and red colors. To remove these warnings, Set Root Email first. Next, to enable the firewall, click the Firewall tab in the dashboard and start the firewall by clicking Enable Firewall in the firewall manager section.
Conclusion
Congratulation! Now we have CWP installed and a ready-to-use.
The CentOS Web Panel offers a huge number of options and features for server management in its control panel package. In this article we show how to install CWP on CentOS 7, but you can explore the official CWP wiki.
 on Ubuntu 18.04")


0 COMMENTS