

Introduction
NextCloud is an open-source and self-hosted client-server software that can be used for sharing files, contacts, and calendars. It is very similar to Dropbox and Google Drive, but your files will be private and stored on your server. NextCloud also provides media player, calendar and contact management. It can be extensible using apps and provide desktop and mobile clients for all major operating systems.
In this tutorial, we will install NextCLoud on Ubuntu 18.04 server.
Prerequisites
To follow this guide, you'll need a fresh installed Ubuntu 18.04 server, a regular, non-root user with sudo permission, enable a basic firewall to block non-essential ports, 1GB of memory and a processor with 2 cores and a valid domain name is pointed to your server IP address.
When you have an account available, log in as your non-root user to begin.
Install Apache, MariaDB and PHP
First, you will need to install Apache, MariaDB, PHP and other PHP extensions to your server. You can install all of them by running the following command:
$sudo apt-get install apache2 mariadb-server apache2 php7.2 php7.2-gd php7.2-json php7.2-mysql php7.2-curl php7.2-mbstring php7.2-intl php7.2-imagick php7.2-xml php7.2-zip libapache2-mod-php7.2 unzip wget -y
Once all the required packages are installed, open php.ini file and twick some settings:
$sudo nano /etc/php/7.2/apache2/php.ini
Make the following changes:
/etc/php/7.2/apache2/php.ini
file_uploads = On allow_url_fopen = On memory_limit = 256M upload_max_filesize = 100M display_errors = Off date.timezone = America/Chicago
Save and close the file. Then, start Apache and MariaDB service and enable them to start on system reboot with the following command:
$$$$sudo systemctl start apache2
sudo systemctl start mariadb
sudo systemctl enable apache2
sudo systemctl enable mariadb
Configure Database
Next, you will need to create a database and user for NextCloud. First, log in to MariaDB shell with the following command:
$mysql -u root -p
Provide your root password then create a database and user for NextCloud with the following command:
MariaDB >MariaDB >CREATE DATABASE nextclouddb;
CREATE USER 'nextclouduser'@'localhost' IDENTIFIED BY 'password';
Next, grant all the privileges on NextClod database with the following command:
MariaDB >GRANT ALL ON nextclouddb.* TO 'nextclouduser'@'localhost' IDENTIFIED BY 'password' WITH GRANT OPTION;
Next, flush the privileges and exit from the MariaDB shell with the following command:
MariaDB >MariaDB >FLUSH PRIVILEGES;;
EXIT;
Install NextCloud
First, you will need to download the latest version of NextCloud from their official website. You can download it with the following command:
$wget https://download.nextcloud.com/server/releases/nextcloud-16.0.3.zip
Once the download is completed, unzip the downloaded file to the Apache web root directory with the following command:
$sudo unzip nextcloud-16.0.3.zip -d /var/www/html/
Next, give proper permissions to the nextcloud directory:
$sudo chown -R www-data: /var/www/html/nextcloud
Configure Apache for NextCloud
Next, create an Apache virtual host file for NextCloud with the following command:
$sudo nano /etc/apache2/sites-available/nextcloud.conf
Add the following lines:
/etc/apache2/sites-available/nextcloud.conf
<VirtualHost *:80> ServerAdmin [email protected] DocumentRoot /var/www/html/nextcloud/ ServerName example.com <Directory /var/www/html/nextcloud/> Options +FollowSymlinks AllowOverride All Require all granted <IfModule mod_dav.c> Dav off </IfModule> SetEnv HOME /var/www/html/nextcloud SetEnv HTTP_HOME /var/www/html/nextcloud </Directory> ErrorLog ${APACHE_LOG_DIR}/error.log CustomLog ${APACHE_LOG_DIR}/access.log combined </VirtualHost>
Save and close the file. Then, enable virtual host file and other required modules with the following command:
$$$$$$sudo a2ensite nextcloud.conf
sudo a2enmod rewrite
sudo a2enmod headers
sudo a2enmod env
sudo a2enmod dir
sudo a2enmod mime
Finally, restart Apache service to apply all the configuration changes:
$sudo systemctl restart apache2
Access NextCloud Web Interface
Now, open your web browser and type the URL http://example.com. You should see the NextCloud setup wizard in the following page:
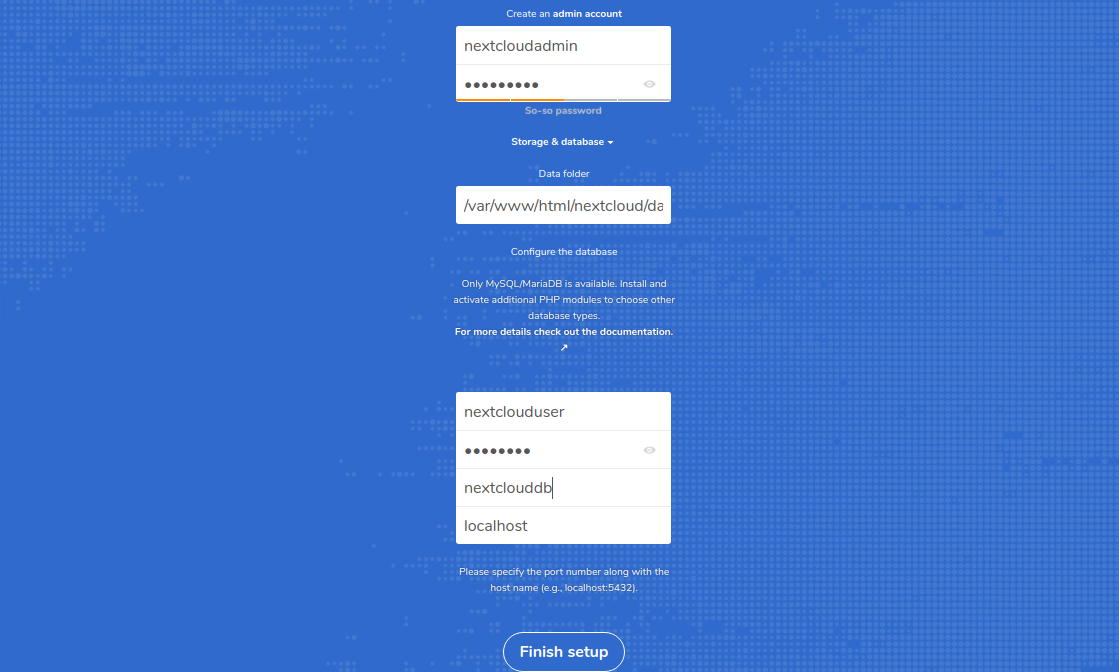
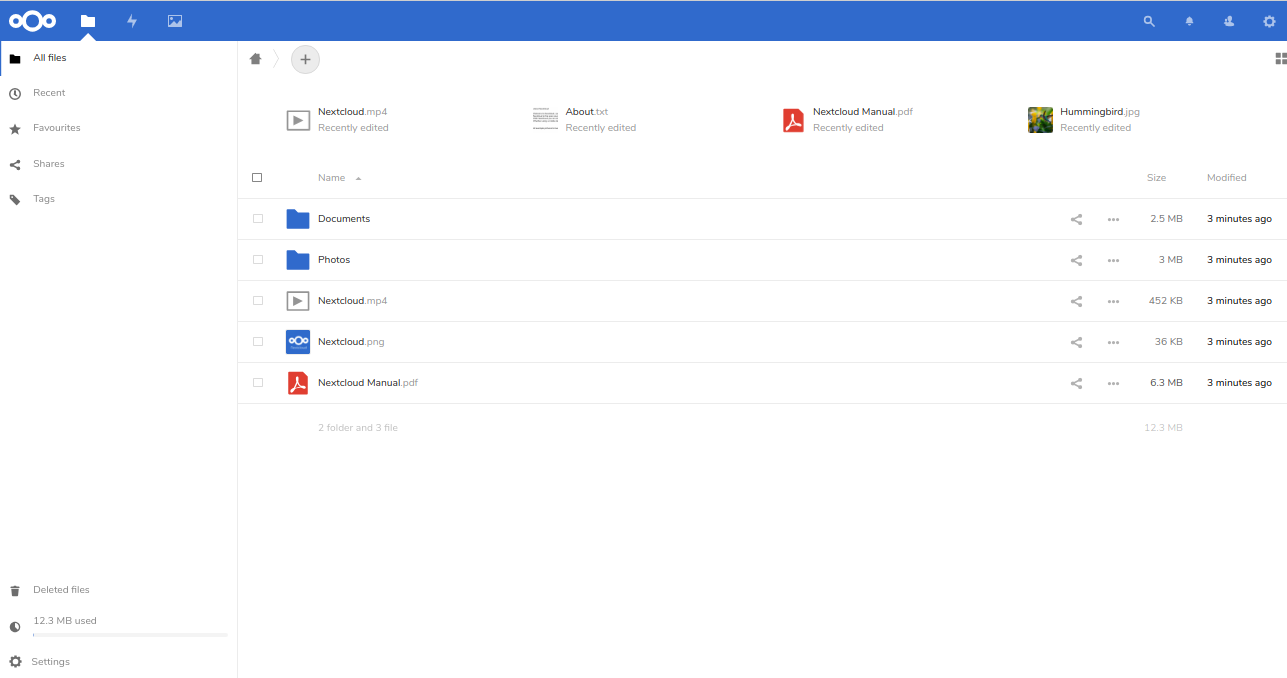
Now, provide your database details, admin username and password. Then, click on the Finish setup button. Once the installation has been completed successfully, you should see the NextCloud default dashboard in the following page:


 on Ubuntu 24.04")


0 COMMENTS