

Introduction
Magento is a free, open source and a flexible content management system for e-commerce websites. It is written in PHP language and uses MariaDB/MySQL for databases. It is used by small and large companies, and can be extended by thousands of extensions and themes. It comes with powerful features including, Flexible Modular Architecture, Enterprise-grade Scalability and Performance. Magento enables you to host eCommerce and online stores in minutes.
In this tutorial, we will show you how to install Magento on Ubuntu 18.04 server.
Prerequisites
To follow this guide, you'll need a fresh installed Ubuntu 18.04 server, a regular, non-root user with sudo permission, enable a basic firewall to block non-essential ports, 2GB of memory and a processor with 2 cores and a valid domain name is pointed to your server IP address.
When you have an account available, log in as your non-root user to begin.
Step 1 - Install LAMP Server
Let's start by installing LAMP server (Apache, MariaDB and PHP) on your server with the following command:
$sudo apt-get install apache2 mariadb-server libapache2-mod-php7.2 php7.2 php7.2-common php7.2-mbstring php7.2-xmlrpc php7.2-soap php7.2-gd php7.2-xml php7.2-intl php7.2-mysql php7.2-cli php7.2-mcrypt php7.2-ldap php7.2-zip php7.2-curl php7.2-bcmath wget unzip git
Once all the packages are installed, start Apache and MariaDB service and enable them to start after system reboot with the following command:
$$$$sudo systemctl start apache2
sudo systemctl enable apache2
sudo systemctl start mariadb
sudo systemctl enable mariadb
Step 2 - Configure Database
By default, MariaDB is not secured. So you will need to secure it first. You can secure it with the following command:
$sudo mysql_secure_installation
Answer all the questions as shown below:
        Enter current password for root (enter for none): Just press the Enter
Set root password? [Y/n]: Y
New password: Enter password
Re-enter new password: Repeat password
Remove anonymous users? [Y/n]: Y
Disallow root login remotely? [Y/n]: Y
Remove test database and access to it? [Y/n]:  Y
Reload privilege tables now? [Y/n]:  Y
Once MariaDB is secured, log in to MariaDB shell with the following command:
$sudo mysql -u root -p
Enter your root password when asked, then create a database and user for Drupal with the following command:
MariaDB >MariaDB >CREATE DATABASE magento;
CREATE USER 'magentouser'@'localhost' IDENTIFIED BY 'password';
Next, grant all the privileges to the Magento database with the following command:
MariaDB >GRANT ALL ON magento.* TO 'magentouser'@'localhost' IDENTIFIED BY 'password' WITH GRANT OPTION;
Next, flush the privileges and exit from the MariaDB shell with the following command:
MariaDB >MariaDB >FLUSH PRIVILEGES;
EXIT;
Once the database is configured, you can proceed to the next step.
Step 3 - Install Magento
First, go to the Magento website and download the latest version of Magento. Once the download is completed, extract the downloaded file in Apache root directory with the following command:
$$sudo mkdir /var/www/html/magento
sudo unzip Magento-CE-2.3.2-2019-06-13-03-19-34.zip  -d /var/www/html/magento/
Next, give proper permissions to the magento with the following command:
$sudo chown -R www-data:www-data /var/www/html/magento
Once you have done, you can proceed to the next step.
Step 4 - Configure Apache Web Server
Next, you will need to configure Apache for Magento. To do so, create an Apache virtual host file with the following command:
$sudo nano /etc/apache2/sites-available/magento.conf
Add the following lines:
/etc/apache2/sites-available/magento.conf
<VirtualHost *:80> ServerAdmin [email protected] DocumentRoot /var/www/html/magento/ ServerName example.com
 <Directory /var/www/html/magento/>
    Options Indexes FollowSymLinks MultiViews
    AllowOverride All
    Order allow,deny
    allow from all
 </Directory>

 ErrorLog ${APACHE_LOG_DIR}/error.log
 CustomLog ${APACHE_LOG_DIR}/access.log combined
</VirtualHost>
Save and close the file. Then, enable Apache virtual host and rewrite module with the following command:
$$sudo a2ensite magento.conf
sudo a2enmod rewrite
Finally, restart Apache2 load all the settings by running the following command:
$sudo systemctl restart apache2
Step 5 - Access Magento
Now, open your web browser and type the URL http://example.com You will be redirected to the following page:
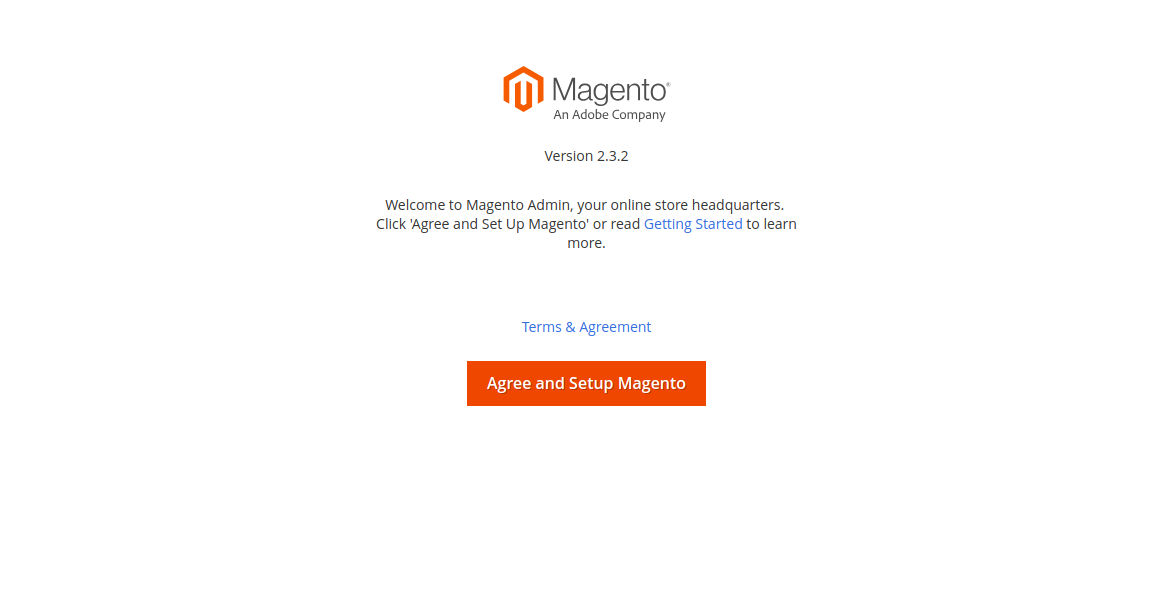
Now, click on the Agree and Setup Magento button. You should see the following page:
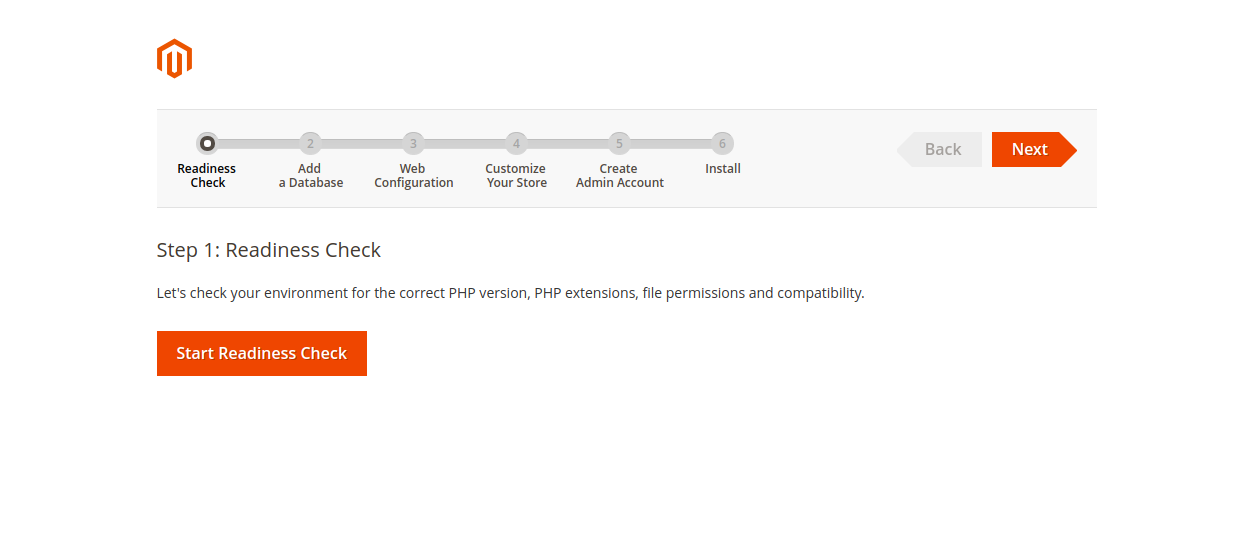
Click on the Start Readiness check to start the test. Once the Readiness check completed successfully. You should see the following page:
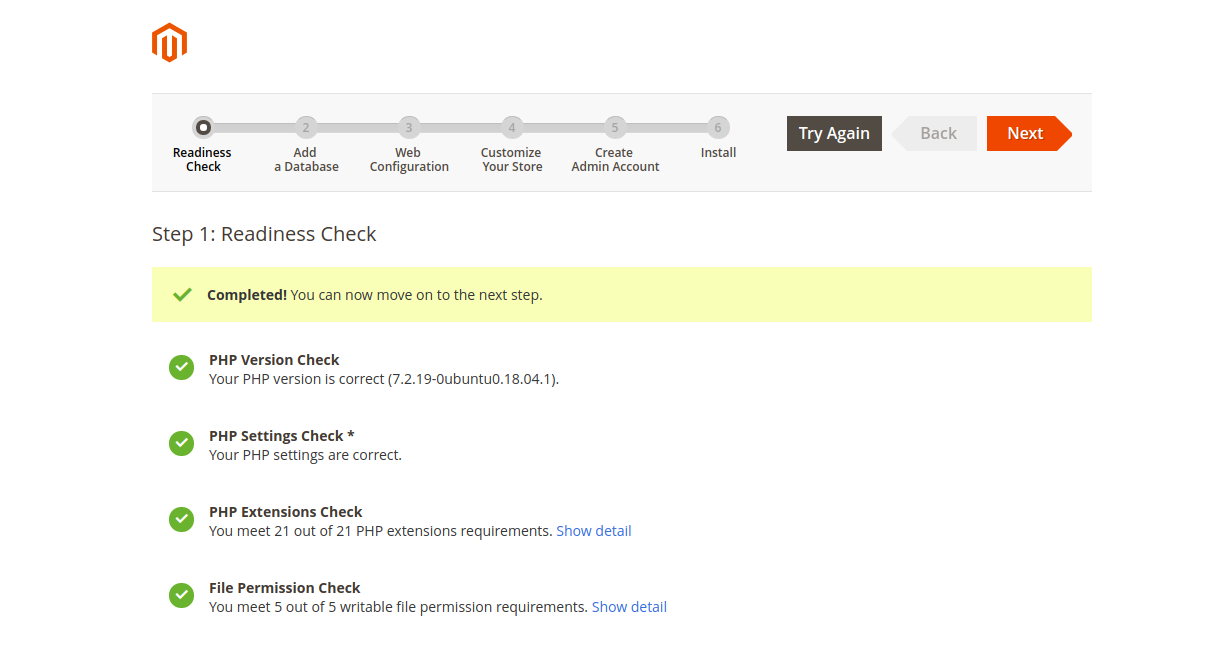
Now, click on the Next button. You should see the following page:
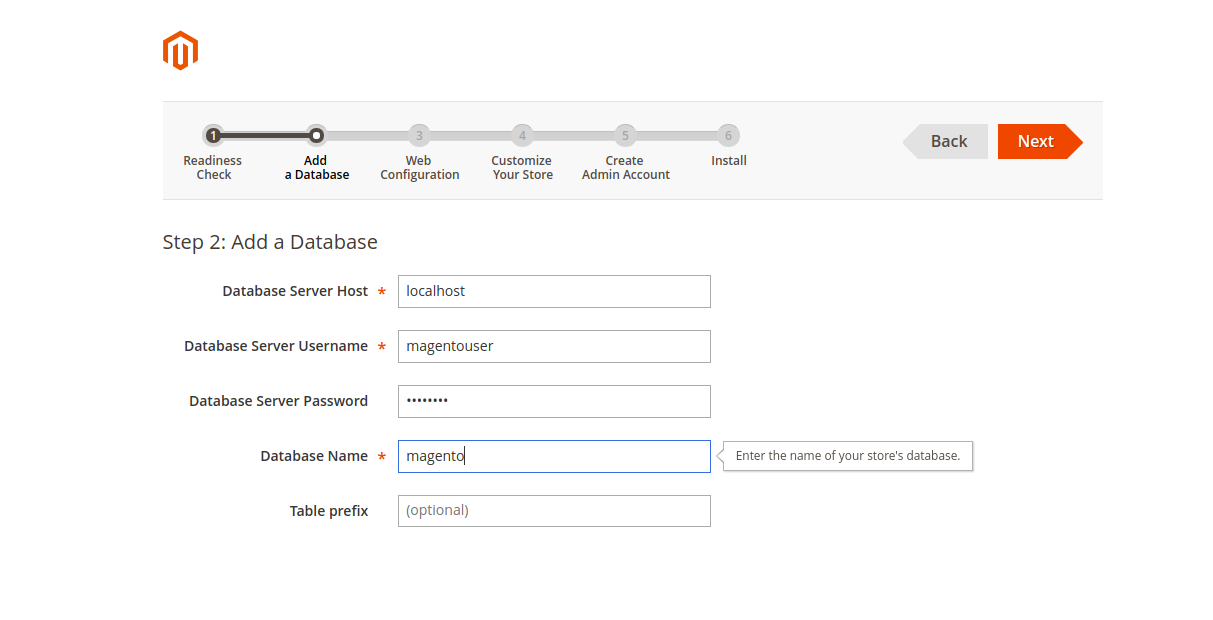
Provide your database details and click on the Next button. You should see the following page:
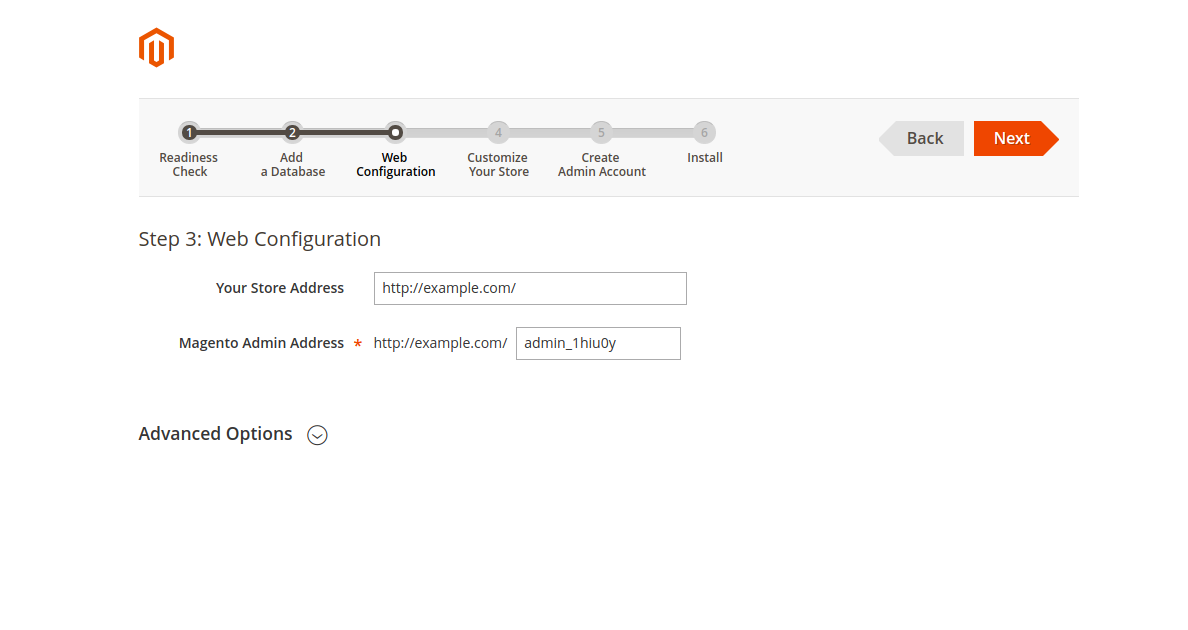
Provide your server URL and click on the Next button. You should see the following page:
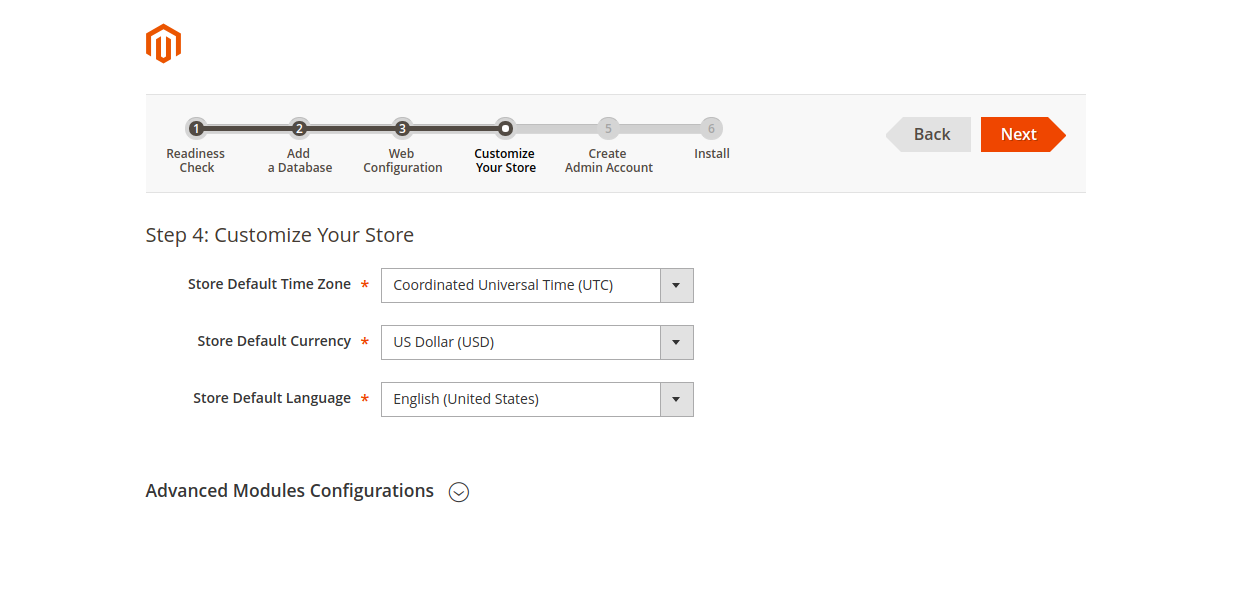
Next, customize your store and click on the Next button. You should see the following page:
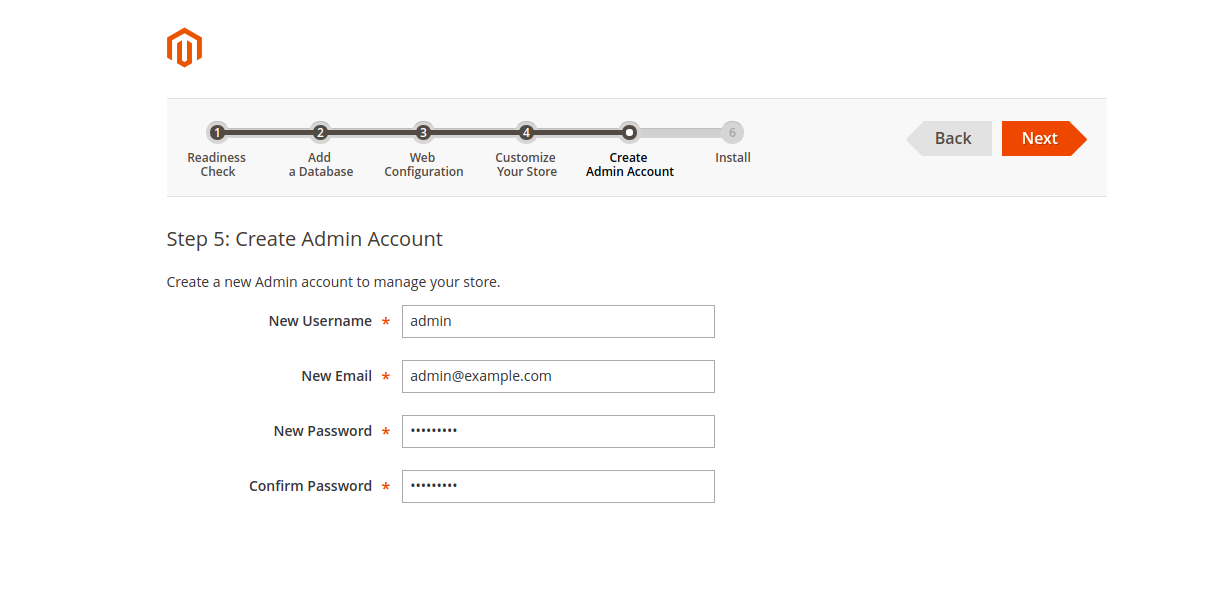
Next, create an admin account and click on the Next button. You should see the following page:
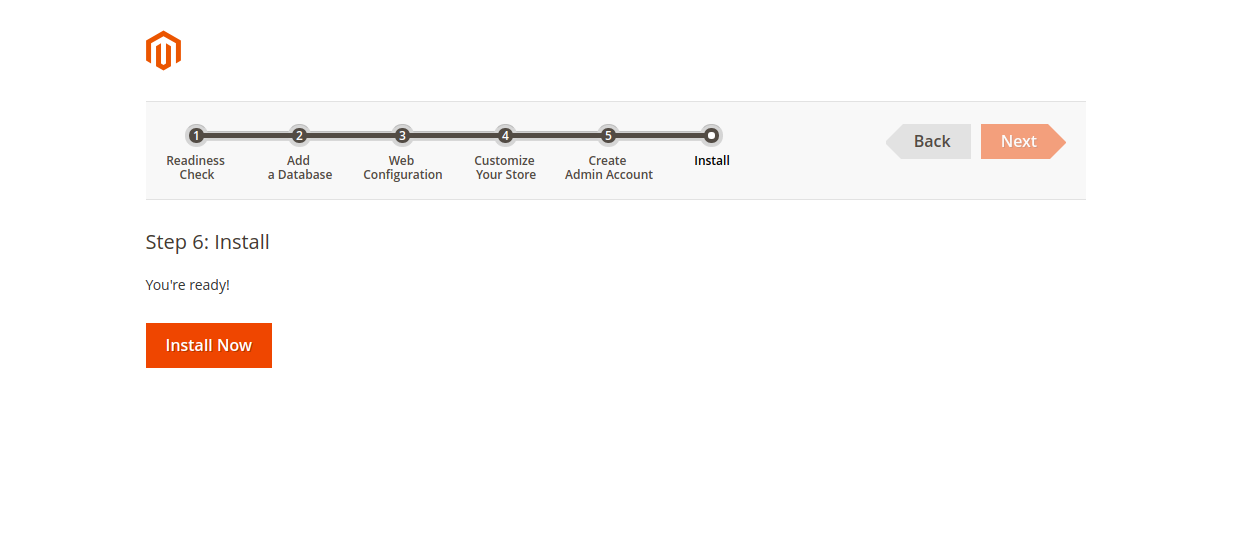
Now, click on the Install button to start the installation. Once the installation has been completed successfully, open your web browser and type the URL http://example.com/admin_1hiu0y/. You should see the following page:
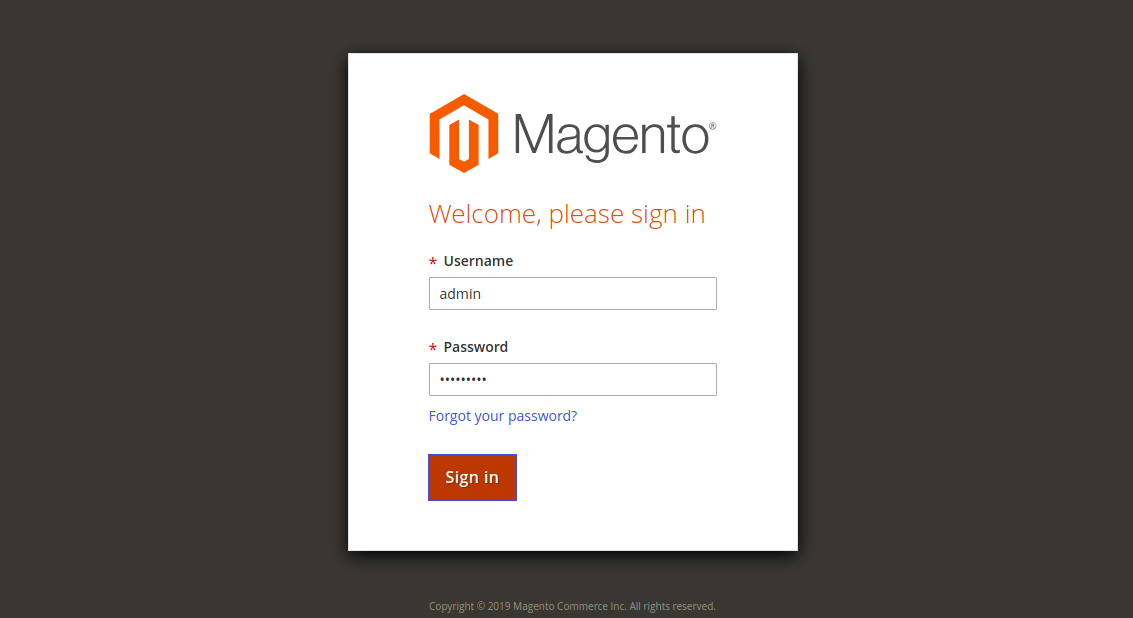
Provide your admin username and password, and click on the Sign In button. You should see your Magento dashboard in the following page:
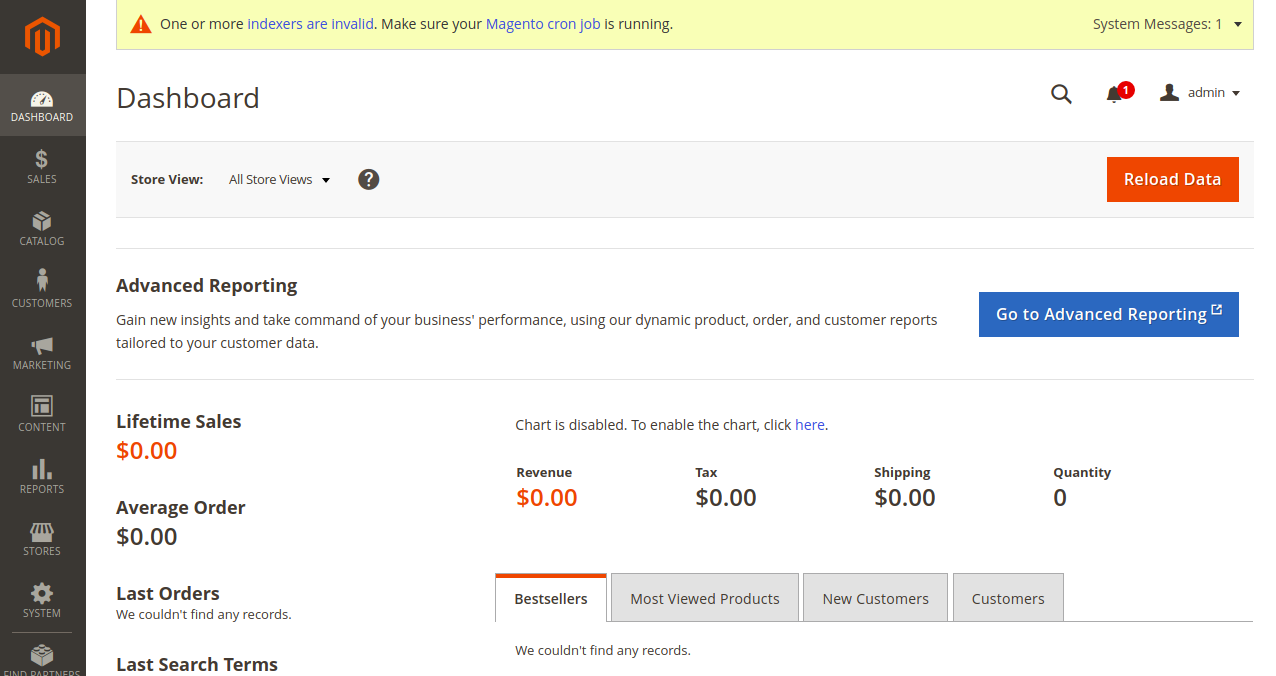
Congratulations! you have successfully installed and configure Magento on Ubuntu 18.04 server. You can now host your own online store easily with Magento dashboard.


 on Ubuntu 24.04")


0 COMMENTS